| Map Gridlines | |
|
|
The Map Gridlines tool creates a map gridlines (graticules) layer which includes coordinates labels and an image border.
Layers -> Map Gridlines |
*Note: this help page is slightly out of date - see SeaDAS 7.4 Release Notes
Map Gridlines have been significantly revised for SeaDAS 7.1 with a lot of new parameter option choices for the user.
Below are some examples.
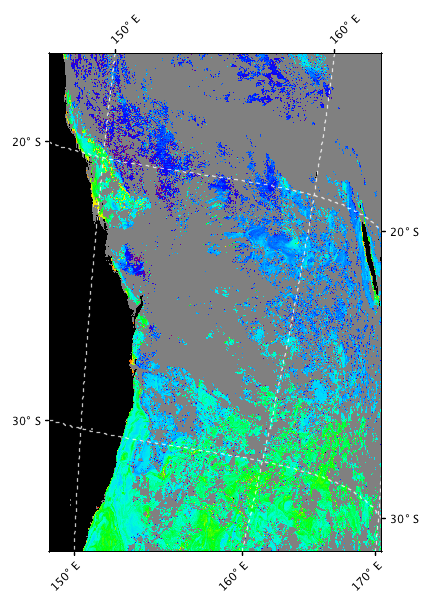
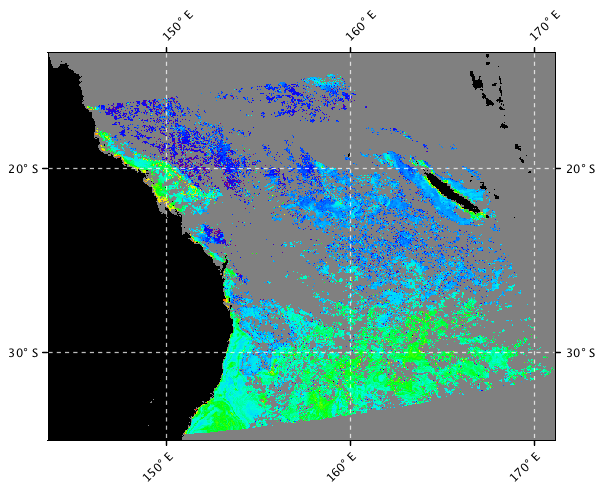
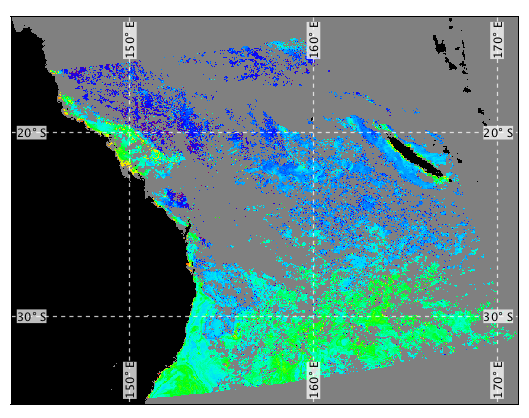
The following 4 images were created with SeaDAS using the same Chloryphyll product scene
of a level-2 file. They show various applications of map gridlines along with the effects
of reprojection on the map gridlines.
Editing parameters of the map gridlines - To edit any of the parameters click on the Layer Editors icon ![]() .
This will enable you to edit whichever layer is
currently selected. If the Map Gridline layer does not show up in the Layer Editors window, then toggle the Map
Gridlines button
.
This will enable you to edit whichever layer is
currently selected. If the Map Gridline layer does not show up in the Layer Editors window, then toggle the Map
Gridlines button ![]() off then on, this will make the Map Gridline layer the selected layer. The Layer Manager window
is another place where you may select a layer to be the selected layer.
off then on, this will make the Map Gridline layer the selected layer. The Layer Manager window
is another place where you may select a layer to be the selected layer.
The following image shows the user editable components of the map gridlines. Most fields are pretty
self-explanatory.
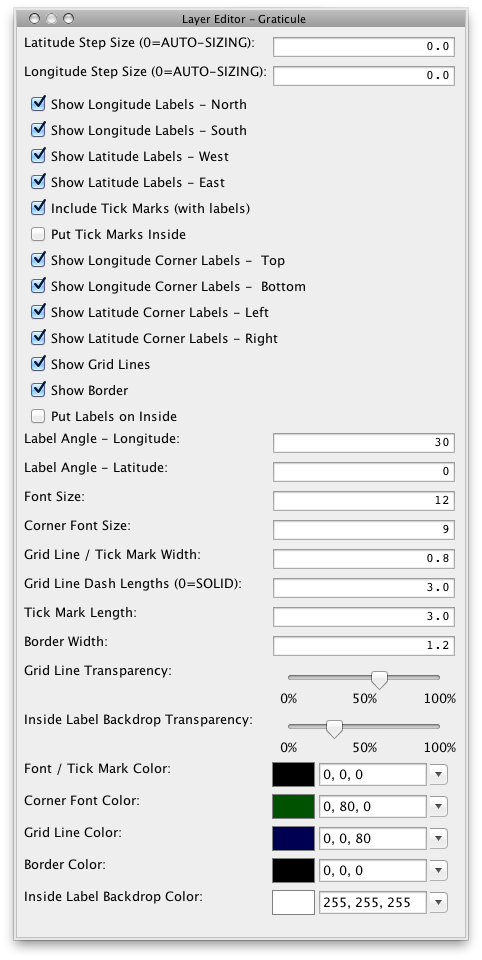
Gridline Spacing - The latitude and longitude step sizes may be set directly where the value represent
degrees between the gridlines.
Setting
this field to zero results in Auto-Sizing. The Auto-Sizing algorithm will set the gridline spacing to a reasonable
value such that there are about 3-5 lines. Also note that lines are placed at the nearest most sensible degree
value.
Font Sizing - The user font settings are in term of points rather than pixels. This enables a single user
font setting and default to work well with files of any resolution. Internally the font sizes are actually tied
to the pixel sizes and there is a conversion of points to pixels being made.
Low Resolution (in pixel space) Problems - For files with an extremely low resolution image, less than
about (100 x 100) pixels resolution,
you may expect to see problems with the map gridlines, such as missing labels.
Put Labels on Inside - By default this checkbox is unchecked and the coordinate text labels are placed
outside
the image. This looks great and is our preferred look. But, keep in mind, that when an image window is first opened,
the image fills the window (at least in one dimension). Toggling the
gridline labels on and off doesn't affect the zoom of the image. So to view these "outside" labels, the user will
need to zoom the
image out.
Exporting an image with gridlines - Use the "Export Image" tool. This tool is located at File -> Export
Utilities -> Image or it can be found in
the drop down menu when the image is right clicked with the mouse. If your labels are "outside" the image then
select "View Window" from the "Source Boundaries" panel. For more on this see
Publication Quality Images.
User Preferences -
For this release most of the
preferences have been removed, but decent automated defaults are being used which are dynamic to the image
resolution. We do plan on updating the user preferences capabilities to include all the new options in a future
release.