
| Time Series Manager | |
This page comprises a short definition of Time Series in the context of the SNAP Time Series Tool, and describes how such Time Series are created and edited using the Time Series Manager tool.
Within the Time Series Tool, a time series is specified by several source products and variables. Every product
comprising remote-sensing bands may be used as source product of a time series.
However, products need to share at least one remote-sensing band in order to create a meaningful time series.
A time series comprises several bands of the same variable, for example, 4 bands of TSM_mean,
each originating from a different source product.
The Time Series Manager, opened by a click on  ,
allows to manage time series in a broad sense. In short, it allows the user to
,
allows to manage time series in a broad sense. In short, it allows the user to
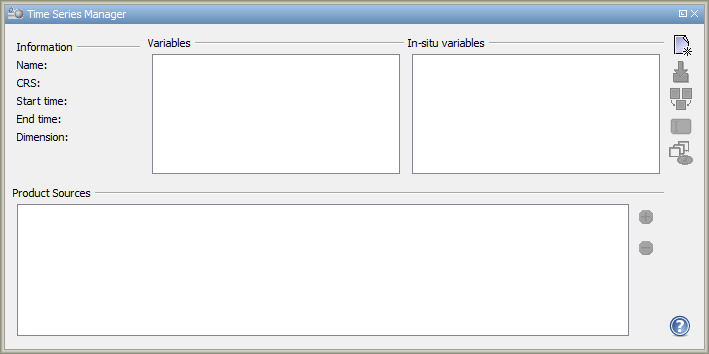
Screenshot 1 shows the time series manager in its initial state.
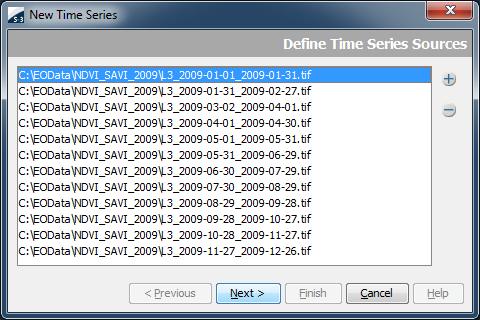
The point of entry is the Time Series Wizard, which is started by clicking on
 . It allows the user to specify source products in three
different ways: either a directory is scanned for products or a directory is scanned together with its
sub-directories, or single products may be chosen (see Screenshot 2).
. It allows the user to specify source products in three
different ways: either a directory is scanned for products or a directory is scanned together with its
sub-directories, or single products may be chosen (see Screenshot 2).
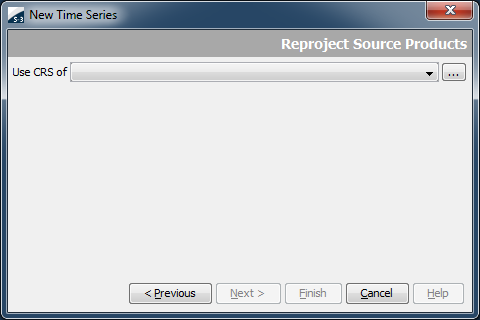
If all specified products are on the same grid and have the same bounds, the following step is skipped. If not, the products need to be reprojected for the time series. Reprojection is done by specifying an already projected reference product and using its CRS and its bounds. Therefore, these reference products needs to intersect the products which shall appear in the time series. See Screenshot 3 for the wizard's reprojection page.
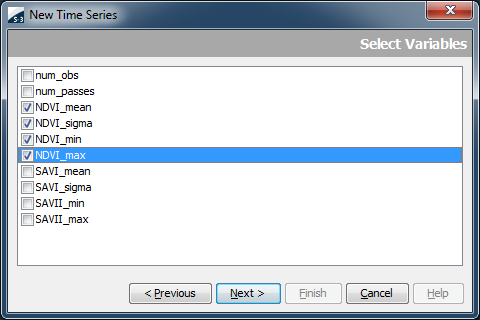
In the next step, the wizard allows to specify the variables the time series shall contain. The list of possible variables is derived from the products which have been chosen in the previous step. This step is displayed in Screenshot 4.
After that, the user may assign the time series a name and finish the wizard. See Screenshot 5.

After the wizard is finished, the Time Series Manager now looks as displayed in Screenshot 6.

On the upper left, there are provided some general information about the time series, such as the start and end
time, the CRS and the dimensions. In the upper middle, the variables from the bands may be selected and de-selected.
Only selected variables are featured in the time series, thus, if a variable becomes de-selected, it is instantly
excluded from the time series.
On the upper right, in-situ variables may be added or removed. The lower panel displays the product sources and
allows the user to add or remove products of the time series.
On the panel's right, there are a number of buttons which become active after creating the time series.
The  -button allows the user to load in-situ data from a
CSV-file. The columns within that file need to be tab (char='\t') separated.
-button allows the user to load in-situ data from a
CSV-file. The columns within that file need to be tab (char='\t') separated.
See listing 1 for an exemplary in-situ source file.
| Name | Lon | Lat | Time | Fo | CHL |
| AMRU2 | 7.8333 | 54.6667 | 2010-01-23 01:21 | 19.9 | 0.46 |
| DTEND | 4 | 55.5 | 2010-01-25 18:35 | 16.9 | 0.39 |
| DTEND | 4 | 55.5 | 2010-01-25 19:35 | 16.8 | 0.41 |
|
|||||
| Listing 1 - An exemplary in-situ source file | |||||
The import mechanism automatically detects columns for station name, latitude, longitude, and time. All
other columns are interpreted as measurement parameter.
Note that all valid column names are case insensitive.
| Column | valid names |
|---|---|
| Latitude | "lat", "latitude", "northing" |
| Longitude | "lon", "long", "longitude", "easting" |
| Time | "time", "date" |
| Station name | "name", "station", "label" |
On click on the  -Button, the names association dialog
(see Screenshot 7) opens.
-Button, the names association dialog
(see Screenshot 7) opens.
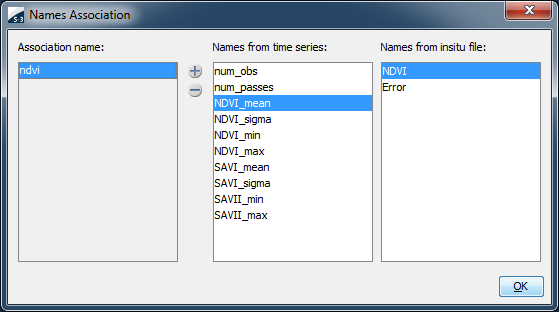
That dialog allows the user to create a mapping between satellite and in-situ data. This is needed if the names in the satellite products are different from the names within the in-situ data, but shall be handled equally. The first step is to create a new alias name (in the example 'algal_2') and then choose from the list of band names and the list of in-situ variable names the names which are to be grouped within that alias. Multiple list entries from a single list may be chosen by holding the Ctrl-button while clicking.
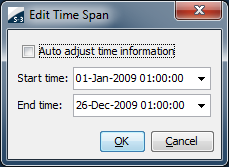
The  -button allows to edit the valid time
span of the time series. The respective dialog is shown in Screenshot 8. Products whose time bounds do not fit into
the time span specified in the tool are excluded from the time series.
-button allows to edit the valid time
span of the time series. The respective dialog is shown in Screenshot 8. Products whose time bounds do not fit into
the time span specified in the tool are excluded from the time series.
The  -button allows the user to show one of the selected variables in
the Product Scene View.
-button allows the user to show one of the selected variables in
the Product Scene View.
Copyright © 2012 by Brockmann Consult (beam-issues@brockmann-consult.de). All rights reserved.